That musty smell when the aircon kicks on is usually your first warning. By the time it is obvious, mould has often already built up inside the unit, around the coil, fan barrel, drain tray or filters. The aircon mould cleaning process is not just about wiping down what you can see. Done properly, it targets the hidden moisture, grime and microbial growth that keep coming back if the source is left in place.
For homes, that can mean poor air quality, reduced cooling performance and a unit that never quite smells clean. In commercial settings, it can turn into a bigger issue – tenant complaints, hygiene concerns, avoidable wear on equipment and more downtime than anyone wants. The right clean fixes the immediate problem, but it also tells you why it happened in the first place.
What causes mould to grow in an air conditioner?
Air conditioners naturally deal with moisture. As warm air passes over the evaporator coil, condensation forms and drains away. That part is normal. The problem starts when dust, organic matter and moisture combine inside the system and stay there long enough for mould to grow.
In Brisbane and across South East Queensland, humidity gives mould a good head start. If filters are clogged, airflow drops and the coil can stay wetter for longer. If the drain is partially blocked, water can sit in the tray instead of clearing away properly. In some systems, especially older split systems or heavily used commercial units, dirt builds up on the indoor fan and around internal surfaces where routine surface cleaning never reaches.
That is why a quick spray-and-wipe job rarely solves it for long. You might improve the smell for a week or two, but if mould is sitting deeper inside the head unit, it will keep returning.
The aircon mould cleaning process step by step
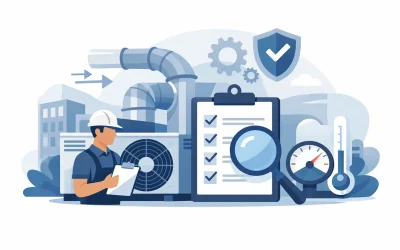
A proper aircon mould cleaning process starts with inspection, not chemicals. A technician needs to check where contamination is sitting, how far it has spread and whether there is an underlying drainage, airflow or maintenance issue causing repeat growth.
1. Isolating the system and opening the unit
The system is powered down and made safe before the indoor unit is opened up. Covers, filters and accessible internal components are removed so the technician can assess the evaporator coil, fan barrel, drain tray and casing. On badly affected systems, mould may be obvious on multiple surfaces. On others, the main issue is hidden behind the coil or on the blower wheel.
This step matters because mould problems are often worse than they look from the outside. A clean filter does not mean a clean unit.
2. Assessing contamination and system condition
Before cleaning begins, the technician checks for signs of blocked drains, excessive dust loading, water staining, damaged insulation or poor airflow. If the mould is a symptom of another fault, that needs to be identified early. Otherwise, the system may be cleaned properly and still end up back in the same condition.
For commercial sites, this part is especially useful because it helps separate a hygiene clean from a mechanical issue. Sometimes it is just mould and grime. Sometimes there is a service fault driving the moisture problem.
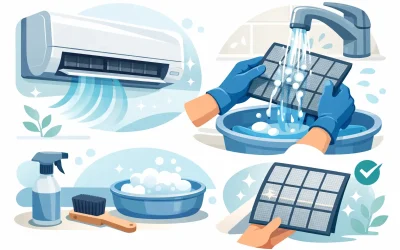
3. Cleaning filters, coil and internal components
Filters are removed and thoroughly cleaned or replaced if they are no longer serviceable. The evaporator coil is treated with cleaning products suited to HVAC use, then washed through carefully to remove built-up dirt, biofilm and contamination. The drain tray is cleaned out and the drain line is checked and flushed where required.
The indoor fan barrel is often the biggest issue in mould jobs. If that spinning fan is coated in grime, every cycle can spread odour and contamination back into the room. Cleaning the fan properly can be labour-intensive, but it is one of the most important parts of the job.
4. Treating mould-affected surfaces
Once the dirt load has been removed, mould-affected surfaces are treated with appropriate cleaning and sanitising products designed for air conditioning equipment. The aim is not to mask odours. It is to remove contamination as thoroughly as possible without damaging sensitive components.
This is where shortcuts cause problems. Overuse of the wrong chemical can corrode parts or leave residue behind. Under-cleaning leaves mould spores and organic matter in place. A balanced, equipment-safe approach is what gets the result.
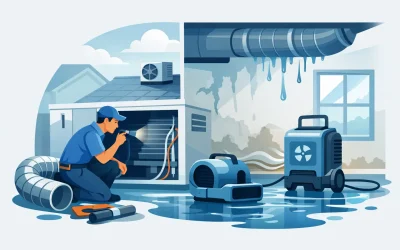
5. Clearing drainage and checking moisture pathways
If condensate cannot drain freely, mould will likely return. The drain line, tray and fall are checked so water can move away as intended. In some cases, the issue is as simple as sludge in the line. In others, installation position, sagging pipework or insulation failure may be contributing to ongoing moisture inside the unit.
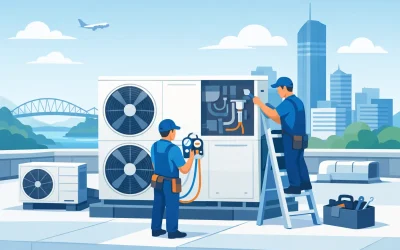
For larger commercial systems, moisture control can involve more than one component. Condensate management, coil condition and airflow all need to work together.
6. Reassembly, testing and performance check
After cleaning, the unit is reassembled and tested. Airflow, temperature performance and drainage are checked, along with general operating condition. This gives the customer a clear picture of whether the mould issue was mainly hygiene-related or tied to a broader service problem.
That final check is where a proper clean separates itself from a cosmetic one. You want the system not just looking cleaner, but running properly.
What gets cleaned and what usually gets missed?
The parts most people know about are the filters and outer cover. They matter, but they are only part of the picture. Mould commonly builds up on the evaporator coil, fan barrel, drain tray, louvre assembly and internal plastic housing. Depending on the system, there may also be contamination in the drain line or nearby insulation.
What gets missed in cheap or rushed jobs is usually the hard-to-reach internal area where airflow and moisture meet. That is also where odours tend to start. If the fan wheel is not cleaned properly, you can still have smell issues even after the rest of the unit looks presentable.
Can you clean mould out of an aircon yourself?
Basic filter cleaning is a normal part of ownership. Most homeowners can remove, wash and dry reusable filters, and that should be done regularly. But once mould is inside the unit, DIY cleaning has limits.
You cannot properly reach the internal coil, blower and drain system without dismantling parts of the unit. There is also a difference between household cleaners and products suitable for HVAC equipment. Use the wrong product, too much water or too much force, and you can damage fins, electrical components or internal plastics.
For light dust and routine upkeep, do the simple maintenance. For visible mould, persistent smell, water leaks or recurring contamination, it is better to bring in a qualified technician.
When mould cleaning should happen sooner rather than later
If the system smells musty when it starts, pushes out stale air, shows visible spotting around the outlet or leaks water indoors, do not leave it for months. The longer mould and grime build up, the harder the clean can be and the more likely it is that airflow and efficiency will suffer.
Commercial sites should act early as well. In hospitality, education, aged care and shared office environments, indoor air quality complaints can escalate quickly. A delayed response often turns a manageable service job into a bigger operational nuisance.
If the same unit keeps developing mould despite being cleaned, that usually points to an underlying issue. It could be usage patterns, drainage, oversized equipment, poor maintenance intervals or a system fault. That needs a proper diagnosis, not just another surface clean.
How often should aircon mould cleaning be done?
There is no single answer because usage, environment and system type all matter. A lightly used residential split system in a clean, dry room may only need periodic deep cleaning alongside regular servicing. A heavily used bedroom unit, a rental property, a childcare setting or a commercial tenancy with long operating hours may need attention much more often.
Humidity, pets, cooking grease, nearby traffic dust and general indoor cleanliness all affect build-up. That is why maintenance schedules should be based on actual operating conditions, not guesswork.
For many customers, the best approach is simple: keep up with routine servicing, clean filters between visits, and act quickly if smell or mould appears. That stops a hygiene issue turning into a breakdown issue.
Why professional cleaning protects more than air quality
A mould clean is not only about smell. Dirt and biological build-up can restrict airflow, insulate the coil, force the fan to work harder and reduce system efficiency. Over time, that can mean higher running costs, more wear on components and less reliable performance when you need cooling most.
For businesses, that has a direct cost. For homeowners, it usually shows up as rooms taking longer to cool, systems cycling poorly and the sense that the unit is working harder than it should. Professional cleaning helps restore hygiene, but it also supports performance and service life.
At Big Dog Mechanical, that is how the job is approached – not as a quick spray, but as part of keeping the system clean, efficient and dependable.
If your aircon has started smelling off, leaking, or blowing air that does not feel clean, the best move is to get it checked before summer load, humidity and daily use make the problem harder to contain.